Wednesday, January 31, 2018

DIY Planked X Farmhouse Side Table: Free Building Plan

Hello Remodelaholic friends! It’s Ananda from A Piece of Rainbow, where I blog about creative DIY projects for the home and garden. Today I am going to share with you a building plan for a multi-use farmhouse side table!

This planked X side table is so stylish and versatile. It looks great as a side table, end table, or even a small coffee table!

Free Building Plan: Planked X Farmhouse Side Table | Beautiful living room + photo, courtesy of Nesting With Grace

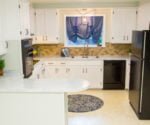
Just look at the inspiration photo above, you will know what I mean! Brooke from Nesting with Grace styled her living room so beautifully with this table. You can check it out at her blog here. Thank you Brooke for sharing your gorgeous photo with us!

Multi Use Side Table Building Plan Apieceofrainbowblog (14)

This post contains affiliate links for our shopping convenience. See our full disclosure policy here

The original table is sold at Wayfair (you can also find it here for slightly less!). I created the plan following their exact dimensions, which is 19.75” H x 19.75” W x 13” D. You can easily modify the dimensions to fit your space and needs!

Before we start building, remember safety first! Please follow good practices to build safely and smartly. Follow safety guidelines of each tool you are using. Always wear eye and hearing protection. Work on a clean level surface, free of clutter or debris.

DIY Farmhouse Side Table Building Plan | Build this versatile multi-use farmhouse end table to use as a side table in the living room or as a bedside table. Living room photo courtesy of Nesting with Grace, free building plan at Remodelaholic.com.

How to Build a Planked X Farmhouse Side Table

Click Here to Get a Free Printable Version of This Building Plan

Materials and tools:

  • 2x2s and 1x4s ( see cut list below )
  • a drill (small drill preferred, see Step 4 )
  • Circular saw and a chisel
  • KregJig pockethole system and 1 1/4″ screws
  • Finish nailer and 1″ finish nails
  • Clamps
  • Wood glue
  • a piece of cardboard or thin plywood, cut to 10″x16.75″, as template

Cut list:

  • (4) 2x2s @ 19.75″ long, (4) 2x2s @ 16.75″ long, (4) 2x2s @ 10″ long,
  • (6) 1x4s @ 16.75″ long, (4) 1x4s @ 10″ long

Helpful tip: read through all the steps and drill required pocket holes before starting Step 1. Sand all cut surfaces with 120 grit sand paper.

Step 1: Building the cross pieces.

This step requires more patience. Everything else gets much easier from here!

Multi Use Side Table Building Plan Apieceofrainbowblog (3)

The two cross pieces are notched together by half-lap joints. To cut half-lap joints as shown in drawing above, set the depth of cut on the circular saw or table saw to half the thickness of the boards, which is 0.75″ for this project. Make a cut along the outside edge of both sides of the joint.

Multi Use Side Table Building Plan Apieceofrainbowblog (12)

This article has some great tips on how to clamp a saw guide and create lap joints using a circular saw.

Make multiple random cuts spaced at about 1/4″. Use a chisel to clear away the wood between the sides of the joint and smooth out the flat surface of the joint.

Multi Use Side Table Building Plan Apieceofrainbowblog (4)

Two of these pieces will form one X. Apply wood glue on the joints, and secure with a couple of 1″ nails.

Step 2: Assemble the side panels.

Multi Use Side Table Building Plan Apieceofrainbowblog (5)

Take a piece of cardboard or thin plywood, cut to 10″x16.75″. Center it on the X piece, use as template to mark the corners as shown above. Trim the corners of the 2x2s using a circular saw, jig saw, or miter saw.

Multi Use Side Table Building Plan Apieceofrainbowblog (6)

Attach the 10″ long 2x2s to the top and bottom of the X piece in two ways. First clamp all 3 pieces together. Then attach them use 1.5″ finishing nails or screw the X piece to the 10″ 2x2s at an angle using flat head screws. The screw heads will be covered by the vertical 2x2s next.

Drill pocket holes in the 10″ 2x2s as shown above and screw the center piece to the vertical 2x2s.

Multi Use Side Table Building Plan Apieceofrainbowblog (7)

Build 2 of these side panels. Now the table will come together in no time!

Step 3: Assemble the top and bottom panels.

Multi Use Side Table Building Plan Apieceofrainbowblog (8)

Screw the 1×4 braces to the 1x4s, then attach the panel to the 2x2s using pocket hole screws. ( One of the 1x4s need to be rip cut to 3″ wide. )

Multi Use Side Table Building Plan Apieceofrainbowblog (9)

Make two of these panels, one for the table top, one for the bottom.

Step 4: Assemble the table.

Multi Use Side Table Building Plan Apieceofrainbowblog (10)

First attach the top panel to the two side panels using pocket hole screws. Here you can see why we need to use a smaller drill, because we have about 16″ of space in between the sides.

Multi Use Side Table Building Plan Apieceofrainbowblog (11)

Attach the bottom piece. We are done building!

Step 5: Apply wood finishes.

If you love a farmhouse whitewashed look, here’s a detailed tutorial on how to whitewash wood using 3 easy and fun techniques. And this ultimate guide to create distressed wood paint finish will be perfect for those who want a rustic chippy paint finish. Make sure to choose non-toxic paint!

How To Whitewash Wood 3 Ways Ultimate Guide Apieceofrainbow 1

You can also leave the wood natural and use an all nature wood wax to finish the table. Here is a tutorial on how to emake my favorite home-made all natural furniture wax easily! The wax will repel stains and dust, and give the wood surface a richness.

Apieceofrainbow Furniture Wax Recipe

Below is another great photo of this stylish table.

Remember, if you do not want to build it, you can purchase it at Wayfair .

Multi Use Side Table Building Plan Apieceofrainbowblog (13)

Happy building! Be sure to pin this for later and share with your DIY friends!

Multi Use Side Table Building Plan | DIY Farmhouse Side Table Building Plan | Build this versatile multi-use farmhouse end table to use as a side table in the living room or as a bedside table. Living room photo courtesy of Nesting with Grace, free building plan at Remodelaholic.com.

More farmhouse style tables you can build yourself:

Farmhouse Double X Console TableDIY Double X Console Table 768x660

Concrete X-Brace Side TableDIY X-Brace Concrete Side Table Plans | Rogue Engineer for Remodelaholic

Waterfall Edge Pallet Wood Outdoor Coffee Table

Easy DIY Sawhorse Console TableDIY Sawhorse Sofa Table20


The post DIY Planked X Farmhouse Side Table: Free Building Plan appeared first on Remodelaholic.


from Home Improvement 1 http://ift.tt/2nsM0Rh

Tuesday, January 30, 2018

5 Color of the Year Paint Trends for 2018

Developed as a way to forecast trends in home decor and fashion, Pantone has declared a new color of the year since 2000. It seems only natural that popular paint brands like Glidden and Dutch Boy are now following suit and making their own “Color of the Year” selections. Although this year you won’t find any of the choices quite as loud or vibrant as Pantone’s 2018 Color of the Year Ultra Violet. Today we’ll explore the 2018 color of the year paint trends from Benjamin Moore, Sherwin-Williams, Glidden, Dutch Boy, and Behr.

Now trending: 2018 color of the year paint colors. Explore Pantone Ultra Violet, Benjamin Moore Caliente, Sherwin-Williams Oceanside, Glidden Deep Onyx, Dutch Boy Sandstone Tint, and Behr In the Moment for home decor and paint inspiration.

5 Color of the Year Paint Trends for 2018

Benjamin Moore – Caliente

First up, is this spicy hue from Benjamin Moore aptly named Caliente. The strong color makes a memorable statement no matter the room. Use it to create a pop of color in an otherwise neutral room or go bold and feature the paint color in a space like the entry way below.

Caliente: Color Of The Year Paint Trends For 2018

Entry Way via Benjamin Moore

Caliente: 5 Color Of The Year Paint Trends For 2018

Red Kitchen Design via BHG

Sherwin-Williams – Oceanside

Sherwin-Williams describes Oceanside as a “rich blue with jewel-toned green, a color that is both accessible and elusive”. Whether your design aesthetic is mid-century modern or farmhouse chic, this new version of teal can be incorporated into your decor in so many of ways.

Oceanside: Color Of The Year Paint Trends For 2018

Is Teal the New Millennial Pink? via Apartment Therapy

Oceanside: Color Of The Year Paint Trends For 2018

The Plain Jane House via Magnolia

Glidden – Deep Onyx

Dark charcoal walls aren’t a new trend but we’re not surprised Glidden chose Deep Onyx as their paint color of the year. This hue sticks around because of its innate ability to make a statement while also remaining neutral. Deep Onyx is an especially gorgeous option for a small space like a powder room or office.

Deep Onyx: Color Of The Year Paint Trends For 2018

12 Black Walls Done Right via Brit + Co

Deep Onyx: Color Of The Year Paint Trends For 2018

Decorating with Black via BHG

Dutch Boy – Sandstone Tint

Sandstone Tint from Dutch Boy proves there doesn’t have to be anything boring about beige. This paint color creates a clean, modern back drop to display all of the other elements in the room. Focus on bringing other natural fibers and textures into the space to enhance the effect.

Sandstone Tint: Color Of The Year Paint Trends For 2018

How to Decorate a Beige Rental Apartment via Apartment Therapy

Sandstone Tint: Color Of The Year Paint Trends For 2018

What Goes With Beige Walls? via BHG

Behr – In the Moment

Last but not least of the 2018 paint color of the year selections is In the Moment by Behr. The combination of blue, grey and green tones creates a soothing tone that’s suitable for both interiors and exteriors. Take a chapter from Joanna Gaines’ design book and use it in a dining area or add visual appeal to a stone exterior by painting the front door.

In the Moment: Color Of The Year Paint Trends For 2018

2018 Colors of the Year via The Creativity Exchange

In The Moment: Color Of The Year Paint Trends For 2018

The Plain Jane House via Magnolia

Inspiration from these five color of the year paint trends isn’t limited to walls and other painted surfaces. Here are some of our favorite home decor items in each of the five color families.

This post contains affiliate links for your convenience. Learn more and read our full disclosure policy here.

CALIENTE

OCEANSIDE

Check out this pretty bedding or the other items below.

DEEP ONYX

We’re loving this pretty knob and all the items below!

SANDSTONE TINT

IN THE MOMENT

Now trending: 2018 color of the year paint colors. Explore Pantone Ultra Violet, Benjamin Moore Caliente, Sherwin-Williams Oceanside, Glidden Deep Onyx, Dutch Boy Sandstone Tint, and Behr In the Moment for home decor and paint inspiration.

Looking for more inspiration? Browse past color of the year articles here in our Color Files:

Decorating With The 2018 Pantone Color Of The Year Ultra Violet Featured On Remodelaholic.com

2015 Paint Color of the Year Benjamin Moore Guilford Green. Remodelaholic

The post 5 Color of the Year Paint Trends for 2018 appeared first on Remodelaholic.


from Home Improvement 1 http://ift.tt/2Eny3vS

Monday, January 29, 2018

DIY Kitchen Update Under $1000 - Today's Homeowner

Updating a Kitchen Under $1000 Budget
How to update your kitchen cabinets, countertops, and hardware for less than $1000.


from Home Improvement 1 http://ift.tt/2rQdeqd

Real Life Rooms: Colonial Porch Curb Appeal

Hey there Remodelaholic readers! Dawn here, from AD Aesthetic, and I’m back this month with another reader question mockup to hopefully inspire some creative ideas for your space. If you’ve missed any of my previous reader question mockups, you can always see all my posts here.

If you follow Remodelaholic on Facebook, you’ve probably seen several of the reader questions that are submitted every month. Well each month here on Remodelaholic, I choose one reader submitted photo to offer my two cents on, and I create a Photoshop mock up of what I would do if I were in your shoes! (Pssssst— you can submit your reader questions by messaging Remodelaholic on Facebook!)

Colonial Porch Curb Appeal Ideas and Inspiration (with columns and railing)

First though, my standard disclaimer: While I can recommend ideas that I think look nice, I have never seen this house in real life and don’t have accurate measurements. I am also not an architect or landscaper and do not know the planting recommendations for your area- I just like to make things look nice. I can’t guarantee that any of the items I put in my ‘virtual’ design will actually work in real life (or that they’ll fit your design style for that matter), and this is not intended to be a professional design consultation. So think of this as a just-for-fun rendering that hopefully gets your wheels turning and provides some inspiration!

On to the fun!

READER QUESTION from Lacie — We just got married and I moved into his home. We have exceeded budget inside but want to start on Phase II (front yard curb appeal) this spring. The front faces southeast and the yard is very sandy so not a lot of grass and no sprinkler system. This is a double lot on the corner so financially we will continue to do in stages. What would make this drab look fab? We plan to stay here @ 4 years until the kids graduate. Phase III backyard is an awesome pool and cabana with two outdoor dogs. Thoughts…New door color, Santa may bring a new glass storm door, might paint the shutters black. Suggestions…?

Before | Colonial Porch Curb Appeal Ideas and Inspiration (with columns and railing)

This home has so much potential! It has a colonial feel to it with those symmetrical windows that could really be played up. At the moment, it looks a little boxy, and the porch is definitely not as exciting as it could be, but with a few updates, I think the house could really shine. Before I started on ideas though, I searched around for a bit of inspiration in the form of similar homes that are doing things right. Here’s what I found:

Ideas for Colonial Porch Curb Appeal

Dutch Colonial Inn | Colonial Porch Curb Appeal Ideas and Inspiration (with columns and railing)

Image Source: Trip Advisor 

Colonial Porch Curb Appeal Ideas and Inspiration (with columns and railing)

Image Source: Archadeck Outdoor Living

Colonial Porch Curb Appeal Ideas and Inspiration (with columns and railing)

Image Source: AJC.com

Colonial Porch Curb Appeal Ideas and Inspiration (with columns and railing)

Image Source: This Old House | Photo Credit: Scott W.

Colonial Porch Curb Appeal Ideas and Inspiration (with columns and railing)

Image Source: Getty Images | Photo Credit: Raven Mathis

With that pretty porch inspiration in mind, here’s what I came up with for Lacie (with the before photo again so you don’t have to scroll to compare):

Before & After | Colonial Porch Curb Appeal Ideas and Inspiration (with columns and railing) After | Colonial Porch Curb Appeal Ideas and Inspiration (with columns and railing)

Sources:

contains affiliate links; see our full disclosure policy here

House numbers  |  Porch chairs  |  Window boxes

Hanging planters  |  Porch light

Adding Colonial Porch Curb Appeal

Unify colors

One of the things that I think was dating the look of this house was the high contrast between the brick on the lower level and the siding color on the upper level. I know not everyone is on board with painting brick, and I don’t always advocate for it myself, but in this case, I think unifying the colors of the two levels really makes the whole home look larger and more cohesive.

Contrast is key

With the base color of the house a nice neutral blank slate, I added contrast with a deep warm brown color for the shutters and trim. Think of it as eyeliner for the house. It sets everything off and looks so rich and pretty.

Let the porch shine

One of the main downfalls of the ‘before’ look is that the huge porch, which should be a major feature, kind of just fades into the house. To help it stand out, I beefed up the columns, added a dark railing to match the dark trim on the rest of the house, and also added a decorative peak above the front door. The peak serves the added functions of breaking up the boxiness of the double layers and bringing the eye up, while further emphasizing the symmetry of the house.

Accessorize

Finally, I added in a ton of personality with just a few accessories. A warm and bright front door is super inviting, and taming the shrubs around that beautiful mature tree with a contained planting wall really makes everything look more tailored and crisp. The new peak on the porch is also the perfect place for some prominent house numbers, and a couple of porch chairs and hanging plants make everything look complete.

So what do you think? What would you do if this were your home?

Colonial Porch Curb Appeal Ideas and Inspiration (with columns and railing)

As always, thank you to Cassity and the Remodelaholic team for having me back each month. If you like this post, and have a design dilemma you’d like me to mock up some ideas for, you can ask your questions by sending Remodelaholic a message over on Facebook, or checkout my mockup design services over on my site adaesthetic.com. And be sure to follow me on Facebook, Pinterest, or Instagram and say hello! Have a great day, friends!

-Dawn


See more curb appeal ideas here:

Modern Colonial Curb Appeal Mockup • AD Aesthetic for Remodelaholic neutral southwest curb appeal Split Level Curb Appeal

The post Real Life Rooms: Colonial Porch Curb Appeal appeared first on Remodelaholic.


from Home Improvement 1 http://ift.tt/2DLKobZ

Saturday, January 27, 2018

How to Build An Easy DIY Bench for Just $25

Hello Remodelaholic’s!  It’s Mindi, from MyLove2Create, and I am thrilled to share my Easy DIY Bench with you today!
Last time I shared my Pottery Barn Inspired Modern Rustic Console Table with you, this is another great furniture build for your home, especially if you like rustic or farmhouse style furniture.

This rustic farmhouse style easy DIY bench is the perfect seating solution for an entryway, bedroom, or dining bench. It requires just 3 boards and will only cost about $25 to build.

Isn’t it so cute?!

This rustic farmhouse style easy DIY bench is the perfect seating solution for an entryway, bedroom, or dining bench. It requires just 3 boards and will only cost about $25 to build.

I kind of love it, and I was excited to try a new finish on it as well, so let’s get started! Watch the video tutorial on the Remodelaholic YouTube channel and read below for the building plan instructions.

How to Build an Easy DIY Bench

Click here to get the building plans at Mylove2create

Supplies:

  • 1- 2×3 board
  • 1- 2×2 board
  • 1- 2×10 board
  • Miter saw
  • drill/driver
  • 2 1/2’’ screws
  • wood glue
  • stain/paint of choice
  • clear coat (poly)
  • sander/sandpaper
 

Cut List:

  • 4- 2×3 boards @ 17 3/4’’ cut 10 degrees off square ends parallel *cut boards with the 1 1/2’’ side laying on the saw bottom, the 2 1/2’’ side will be against the fence (legs)
  • 2- 2×3 boards @ 8 5/8’’ long point to long point cut 10 degrees off square ends NOT parallel cut with 2 1/2’’ side on the saw bottom, the 1 1/2’’ side against the fence (opposite of the legs) (center leg supports)
  • 2- 2×2 boards @ 17 1/4’’ long point to long point cut 45 degrees off square ends NOT parallel (center bench and leg supports)
  • 1- 2×10 board @ 60’’ (bench top)

This rustic farmhouse style easy DIY bench is the perfect seating solution for an entryway, bedroom, or dining bench. It requires just 3 boards and will only cost about $25 to build.


Step 1: Cut legs, supports, and bench top

Cutting Legs 10 Degrees Off Square, Easy DIY Bench, MyLove2Create

Set your miter saw at 10 degrees off square.  Cut the 2×3 legs @ 17 3/4’’ at 10 degrees off square ends parallel *cut boards with the 1 1/2’’ side laying on the saw bottom, the 2 1/2’’ side will be against the fence, as you see above.
I used scrap wood, but if you are using one board, you will cut the very end of the board at 10 degrees off square, then measure and cut the second side of the first leg.  For the second leg you already have your first side cut at an angle from cutting the first leg, so you just have to measure and mark for your second cut.  Repeat until you have all four legs.

Marking And Cutting Center Leg Supports, Easy DIY Bench, MyLove2Create

Cut the 2×3 center leg supports boards @ 8 5/8’’ long point to long point cut 10 degrees off square ends NOT parallel cut with 2 1/2’’ side on the saw bottom, the 1 1/2’’ side against the fence (opposite of the legs).  If you are using one board you will need to trim the end to get your first cut, since the legs were cut on the other edge of the board.

Cutting Middle Support For Legs, Easy DIY Bench, MyLove2Create

For the center bench and leg supports set your saw at 45 degrees off square.  Then cut the 2×2 boards @ 17 1/4’’ long point to long point ends NOT parallel.

Cutting Bench Top And Sanding Pieces, Easy DIY Bench, MyLove2Create

Cut your 2×10 bench top at 60”, you will need your saw set back at 0 degrees.  Once all your pieces are cut, sand them prior to building, of course you can build before sanding, but I find it easier to do it first.

Step 2: Build the legs

Marking Legs For Center Support Easy DIY Bench, MyLove2Create

To build both sets of legs you will need to start by marking on the leg boards 5” up from the bottom.  This is where the bottom of your center supports will go.

Building Bench Legs, Easy DIY Bench, MyLove2Create

Once they are marked, place two legs against a straight edge, either a board or the back of the counter or work bench.  Your center support will need to be 1/2” inset on both sides of the legs, you can see I used a small 1/2” thick scrap of wood so set my center support on so I didn’t have to measure.  ðŸ™‚
When you have everything in place you can clamp your boards down or hold them while you drill in your 2 1/2” screws.  Put two screws through each side into the center support.  If you do not have self tapping (pre-drilling) screws you will need to pre drill holes before you add your screws.  This will help you avoid splitting the wood.  Do this with both sets of legs, and don’t forget the wood glue!

Step 3:  Attach legs to the bench top

Marking Where Bench Legs Attach To Top, Easy DIY Bench, MyLove2Create

The first thing you want to do is mark 8″ from the end of each side of your bench top (the bottom side) then mark approximately 1” from the edges.  Place your legs on these marks, I like to draw around the edge of my legs to clearly mark where then need to be while I am building.

Attach Legs To Bench Top, Easy DIY Bench, MyLove2Create

Place the legs in their marked spots with wood glue.  Then pre-drill two holes at an angle through the inside of the legs into the bench top (I did this even with self-tapping screws to ensure I had a good angle).  Then attach the legs to the top with your 2 1/2” screws.

Step 4:  Add the center bench and leg supports

Adding Leg Supports, Easy DIY Bench, MyLove2Create

Add your center bench and leg supports to the middle of your legs and the bench top.  I first secured each side with a 2” nail and wood glue.  Then I pre drilled holes at an angle and attached the support with my 2 1/2” screws.

Step 5: Finish as desired and Enjoy!

Multi Stain Technique, Easy DIY Bench, MyLove2Create

I decided to do a finish I have been wanting to try for a long time, by my friend Amanda from Rustic Duck Furniture, you can check out her full tutorial.  It is basically layering two different colors of stain randomly on your wood, then blend them together.

White Wash And Dry Brush, Easy DIY Bench, MyLove2Create

After you apply the stain you do a white wash over the wood and blend it in.  To finish it off, you do a dry brush technique, I have done this before you can see an example on my Chalkboard Coat rack, styled X3, it adds so much great texture to a piece.

This rustic farmhouse style easy DIY bench is the perfect seating solution for an entryway, bedroom, or dining bench. It requires just 3 boards and will only cost about $25 to build.

You can see on the bench this finish gives an old look to the furniture.  I love it!

Front Easy DIY Bench, MyLove2Create

It adds charm a character that you do don’t get with a normal stain or paint finish, I am glad I gave it a shot!


Top Side View Easy DIY Bench, MyLove2Create

Of course you can finish it anyway you desire, which is the fun part about doing your own Easy DIY Bench!

This rustic farmhouse style easy DIY bench is the perfect seating solution for an entryway, bedroom, or dining bench. It requires just 3 boards and will only cost about $25 to build.

This bench was inspired by some antique French cherry wood benches I had seen online.  I modified it to make an easy build, since the originals used mortise and tenon joints.

Top Front View Easy DIY Bench, MyLove2Create

I think it turned out perfect!  With the center supports added they make it nice and sturdy.

Low Shot Easy DIY Bench, MyLove2Create

I am actually going to donate this bench to my daughter’s new dance studio, but I have been thinking of trying some counter height ones for my table…because my chairs are dying…but we’ll see.

This rustic farmhouse style easy DIY bench is the perfect seating solution for an entryway, bedroom, or dining bench. It requires just 3 boards and will only cost about $25 to build.

I grabbed these pillows from my Master Bedroom Reveal for some easy staging, before we deliver this bench to its new home.

Long Shot Easy DIY Bench, MyLove2Create

It will make a great little spot for the kids to sit at while they wait or put on their dance shoes.  I have previously donated to my daughter’s old dance studio, How to make a Kingsize Headboard Bench, so I am excited to give this to her new studio!
Do you think they will like it?  I hope so?  Would you like one?  Get building!
Hugs,
Mindi
———————————————

More DIY benches:

free building plan: primitive farmhouse bench

how to build an elegant tufted bench

DIY pallet bench tutorial

build a wood chevron bench with box frame


25+ headboard benches + DIY tutorial

The post How to Build An Easy DIY Bench for Just $25 appeared first on Remodelaholic.


from Home Improvement 1 http://ift.tt/2ngRu16